
安装云平台环境.md 8.7 KB
[TOC]
1.安装前的准备工作
1.1准备三台服务器
需要准备三台服务器并设置静态IP,这里不再赘述。本文档的配置如下
| 节点名称 | ip |
|---|---|
| master | 192.168.238.20 |
| node1 | 192.168.238.21 |
| node2 | 192.168.238.22 |
1.2安装前的准备工作
# 关闭防火墙
systemctl stop firewalld && systemctl disable firewalld

# 关闭selinux
sed -i 's/enforcing/disabled/' /etc/selinux/config  # 永久
setenforce 0  # 临时
cat /etc/selinux/config

# 关闭swap
swapoff -a  # 临时
sed -ri 's/.*swap.*/#&/' /etc/fstab    # 永久
free -m

# 根据规划设置主机名
hostnamectl set-hostname <hostname>

# 在master添加hosts
cat >> /etc/hosts << EOF
192.168.238.20 master
192.168.238.21 node1
192.168.238.22 node2
EOF

# 将桥接的IPv4流量传递到iptables的链
cat > /etc/sysctl.d/k8s.conf << EOF
net.bridge.bridge-nf-call-ip6tables = 1
net.bridge.bridge-nf-call-iptables = 1
EOF
sysctl --system  # 生效

# 修改当前时间为北京时间
# 查看当前系统时间
date
# 修改当前系统时间
date -s "2018-2-22 19:10:30
# 查看硬件时间
hwclock --show
# 修改硬件时间
hwclock --set --date "2018-2-22 19:10:30"
# 同步系统时间和硬件时间
hwclock --hctosys
# 保存时钟
clock -w
上述操作执行完毕后重启
reboot
三台服务器,开始下一步的安装
2.离线安装Docker及其相应组件(三台虚拟机都需要安装)
2.1离线安装Docker
# 1.创建目录存放相应的安装包
mkdir -p /opt/package/

# 2.上传安装包下的docker文件夹到上述的目录中

# 3.进入目录,进行解压缩操作
cd /opt/package/docker
unzip docker19-rpm.zip

# 4.安装docker
rpm -ivh *.rpm  --force --nodeps
systemctl enable docker && systemctl start docker

# 5.查看是否安装成功
docker --version
输出docker版本号表示安装成功

2.2离线安装Docker-compose
将安装包目录下的docker-compose-linux-x86_64文件上传到虚拟机的/opt/package目录下使用命令
// 1.将下载好的文件传入linux系统中,并重命名未docker-compose
mv docker-compose-linux-x86_64 docker-compose
// 2.给予docker-compose文件可执行权限
chmod u+x docker-compose
// 3.将docker-compose文件移至/usr/local/bin
mv docker-compose /usr/local/bin
// 4.查看版本
docker-compose --version
输出docker-compose版本号表示安装成功

3.安装Harbor及相应的配置(只需要一台虚拟机安装)
3.1安装Harbor
- 将压缩包harbor-offline-installer-v2.3.2.tgz上传到
/opt/package/目录下 解压该压缩包
tar xf harbor-offline-installer-v2.3.2.tgz修改harbor安装的配置文件
首先备份一份压缩包
# cp harbor.yml.tmpl  harbor.yml         //复制配置文件内容到harbor.yml 中(安装时只识别harbor.yml)
# mkdir -p /opt/application/harbor       //用于存放harbor的持久化数据
其次对harbor.yml文件进行修改配置
#设置访问地址,可以使用ip、域名,不可以设置为127.0.0.1或localhost。默认情况下,harbor使用的端口是80,若使用自定义的端口,除了要改docker-compose.yml文件中的配置外,这里的hostname也要加上自定义的端口,否则在docker login、push时会报错
hostname: 192.168.0.8:9999
#http配置
http:
# port for http, default is 80. If https enabled, this port will redirect to https port
port: 9999

# https配置(如不需要可不配置,注释掉)
# https related config
# https:
# https port for harbor, default is 443
# port: 443
# The path of cert and key files for nginx
# certificate: /your/certificate/path
# private_key: /your/private/key/path

# external_url: https://reg.mydomain.com:8433
# 如果要启用外部代理,比如外层的NGINX、LB等,请取消注释external_url,当它启用时,hostname将不再使用。
# admin密码
harbor_admin_password: Harbor12345


#数据库配置
database:
# The password for the root user of Harbor DB. Change this before any production use.
password: root123
# The maximum number of connections in the idle connection pool. If it <=0, no idle connections are retained.
max_idle_conns: 50
# The maximum number of open connections to the database. If it <= 0, then there is no limit on the number of open connections.
# Note: the default number of connections is 100 for postgres.
max_open_conns: 100


#持久化数据目录
data_volume: /opt/application/harbor
- 安装并启动Harbor
保证此时在harbor安装文件中,执行install.sh文件进行安装,命令为:./install.sh
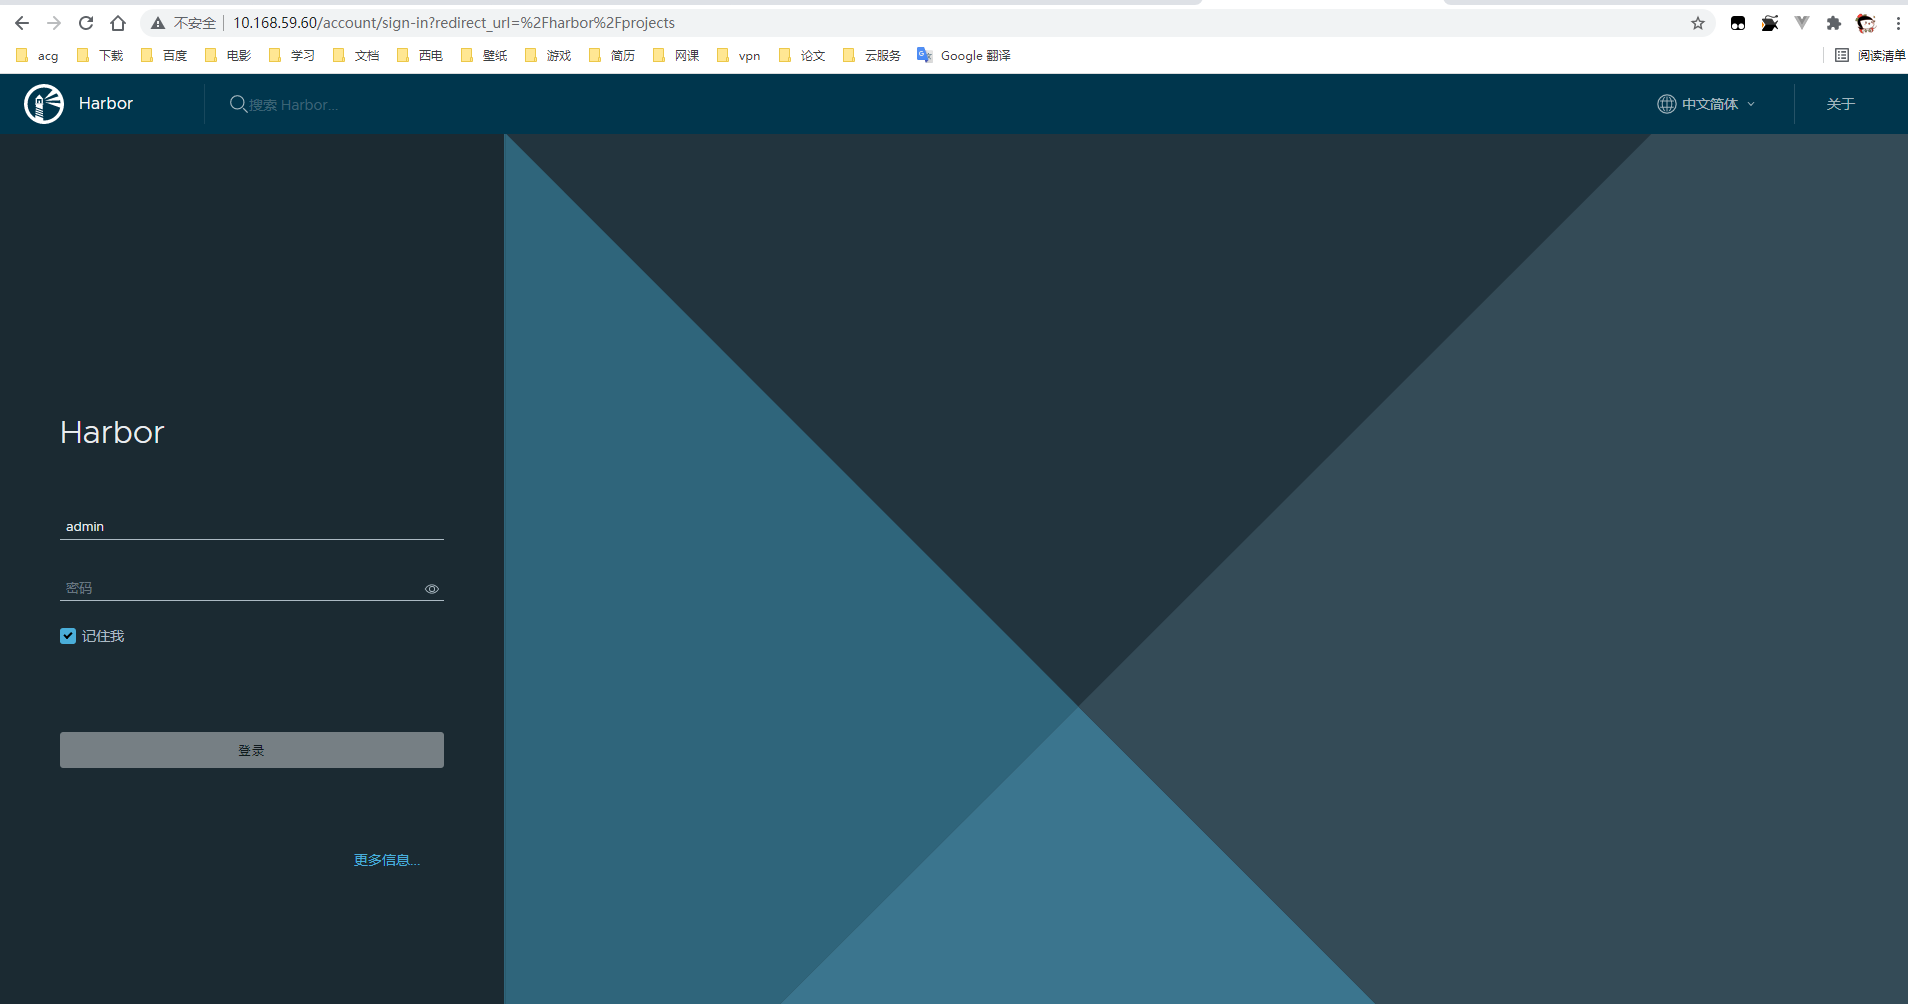
- 访问harbor Web界面
通过自己的ip+端口访问
3.2配置Docker访问Harbor(三台虚拟机都要配置)
首先修改虚拟机的hosts
# 将下面的ip缓存harbor的ip
echo "10.168.59.60  server.harbor.com">> /etc/hosts
docker添加harbor配置-----注意这里要加harbor的端口号,这里配置的端口号为上述harbor配置文件的端口号
mkdir -p /etc/docker

tee /etc/docker/daemon.json <<-'EOF'
{
  "insecure-registries": ["server.harbor.com:80"]
}
EOF

systemctl daemon-reload && systemctl restart docker
输入命令docker login server.harbor.com:80
输入用户名:admin
密码:Harbor12345
 至此,harbor配置完成
5.安装kubesphere及其相应的插件
5.1将离线包上传至harbor仓库(该操作只需在master节点进行)
将安装包目录下的kubesphere文件夹上传至虚拟机master节点的
/opt/package/
目录下
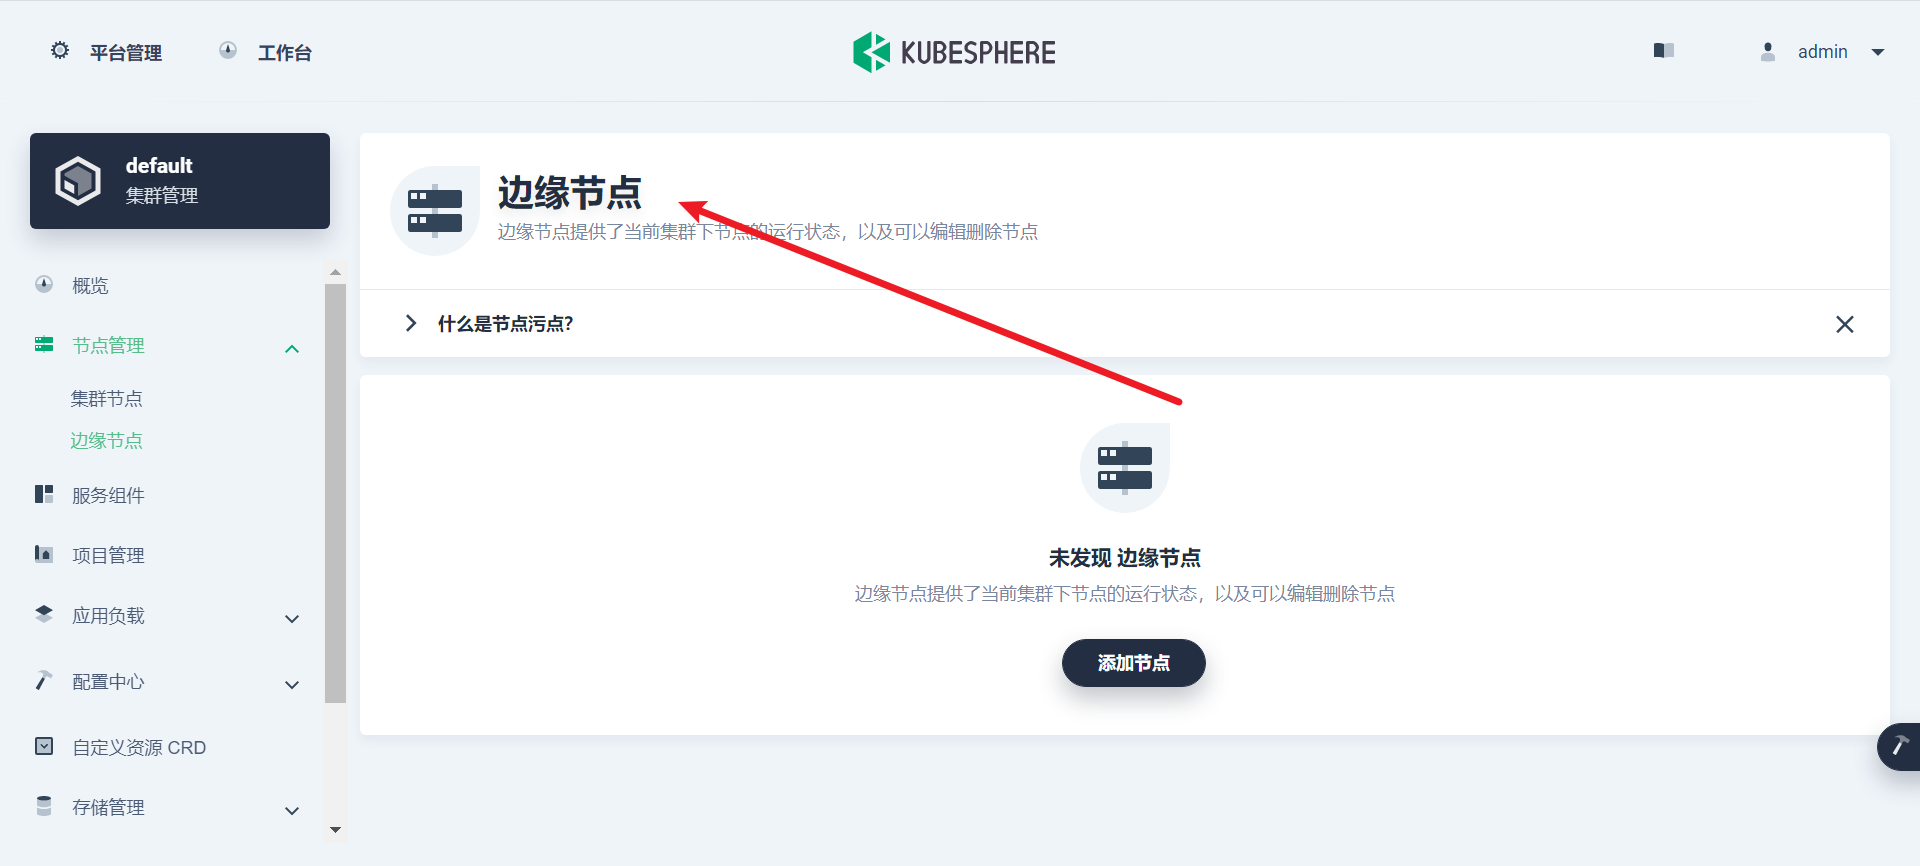
进入harbor仓库
 新建一个kubesphere项目

# 在虚拟机master节点中执行命令

# 进入该路径
cd /opt/package/kubesphere/

# 上传安装包 这里的最后一行改成自己harbor仓库的ip+端口号+项目名称
./offline-installation-tool.sh -l images-list.txt -d ./kubesphere-images -r server.harbor.com:80/kubesphere
# 等待上传完毕

5.2最小化安装kubesphere
# 执行以下命令
# 1.编辑cluster-configuration.yaml添加您的私有镜像仓库
vim cluster-configuration.yaml
spec:
  persistence:
    storageClass: ""
  authentication:
    jwtSecret: ""
  local_registry: server.harbor.com:80/kubesphere   #添加内容

# 2.编辑完成后保存 cluster-configuration.yaml,使用以下命令将 ks-installer 替换为您自己仓库的地址---(本文的harbor安装地址server.harbor.com:80/kubesphere)
sed -i "s#^\s*image: kubesphere.*/ks-installer:.*#        image: server.harbor.com:80/kubesphere/kubesphere/ks-installer:v3.1.1#" kubesphere-installer.yaml

# 3.请按照如下先后顺序安装(必须)
kubectl apply -f kubesphere-installer.yaml
kubectl get pods -A


# 4.等待ks-installer容器运行完毕,执行
kubectl apply -f cluster-configuration.yaml
5.3检查安装日志
# 检查安装日志等待安装成功
kubectl logs -n kubesphere-system $(kubectl get pod -n kubesphere-system -l app=ks-install -o jsonpath='{.items[0].metadata.name}') -f
如下图所示,则表示安装成功

5.4安装必要的插件
本次需要安装额外的几个插件
- KubeSphere日志系统
- KubeSphere DevOps
KubeSphere kubeedge
# 1.编辑cluster-configuration.yaml
vim cluster-configuration.yaml

devops:
enabled: true # 将“false”更改为“true”。

kubeedge:
enabled: true # 将“false”更改为“true”。

logging:
enabled: true # 将“false”更改为“true”。

# 2.执行以下命令开始安装
kubectl apply -f cluster-configuration.yaml

# 3.监控安装过程
kubectl logs -n kubesphere-system $(kubectl get pod -n kubesphere-system -l app=ks-install -o jsonpath='{.items[0].metadata.name}') -f
如下图所示,表示安装成功

附录----安装软件的版本
| 软件 | 版本 |
|---|---|
| centos | 7.5 |
| docker | 19.03.7 |
| docker-compose | 2.1.0 |
| Harbor | 2.3.2 |
| kubernetes, | 1.19.0 |
| kubesphere | 3.1.1 |